


If you want to catch up with the Use Every Scrap Knitalong, simply click on the image above to see all of the posts.
Welcome to the penultimate post in the Use Every Scrap KAL! How did you get on with the heels? I hope they’re happily inserted, with all stitches present and accounted for, and that you’re feeling very pleased with your bravery! Today, we talk legs and particularly, how to accommodate our calves if we’re making longer socks that use every scrap of yarn.
Short(ish) socks
If you are happily knitting away, and just want what I think of as a standard length sock (about a quarter of the way up from ankle to knee), you can continue to knit on the leg until it is approximately 11cm [4.25in] from the top of the heel. Complete your sock by switching to a rib pattern – I’d suggest either 1x1 or 2x2 are most suitable – and work in rib for 5cm [2in]. Then finish off your sock with a stretchy cast-off method. There’s a video tutorial below.
Ta da! Your socks are complete.
Longer socks
However, if you are wanting to use every scrap of a 100g yarn set, or you simply want longer socks, you will need to do some calf increases. The rainbow socks in the image at the top of this post feature this type of calf shaping.
Calf increases will require a bit of calculation, so that you make a sock that fits your legs. Legs are very variable, so I’m not going to offer a one size fits all solution here!
The first task is to measure the circumference of your ankle at the height of your sock right now.
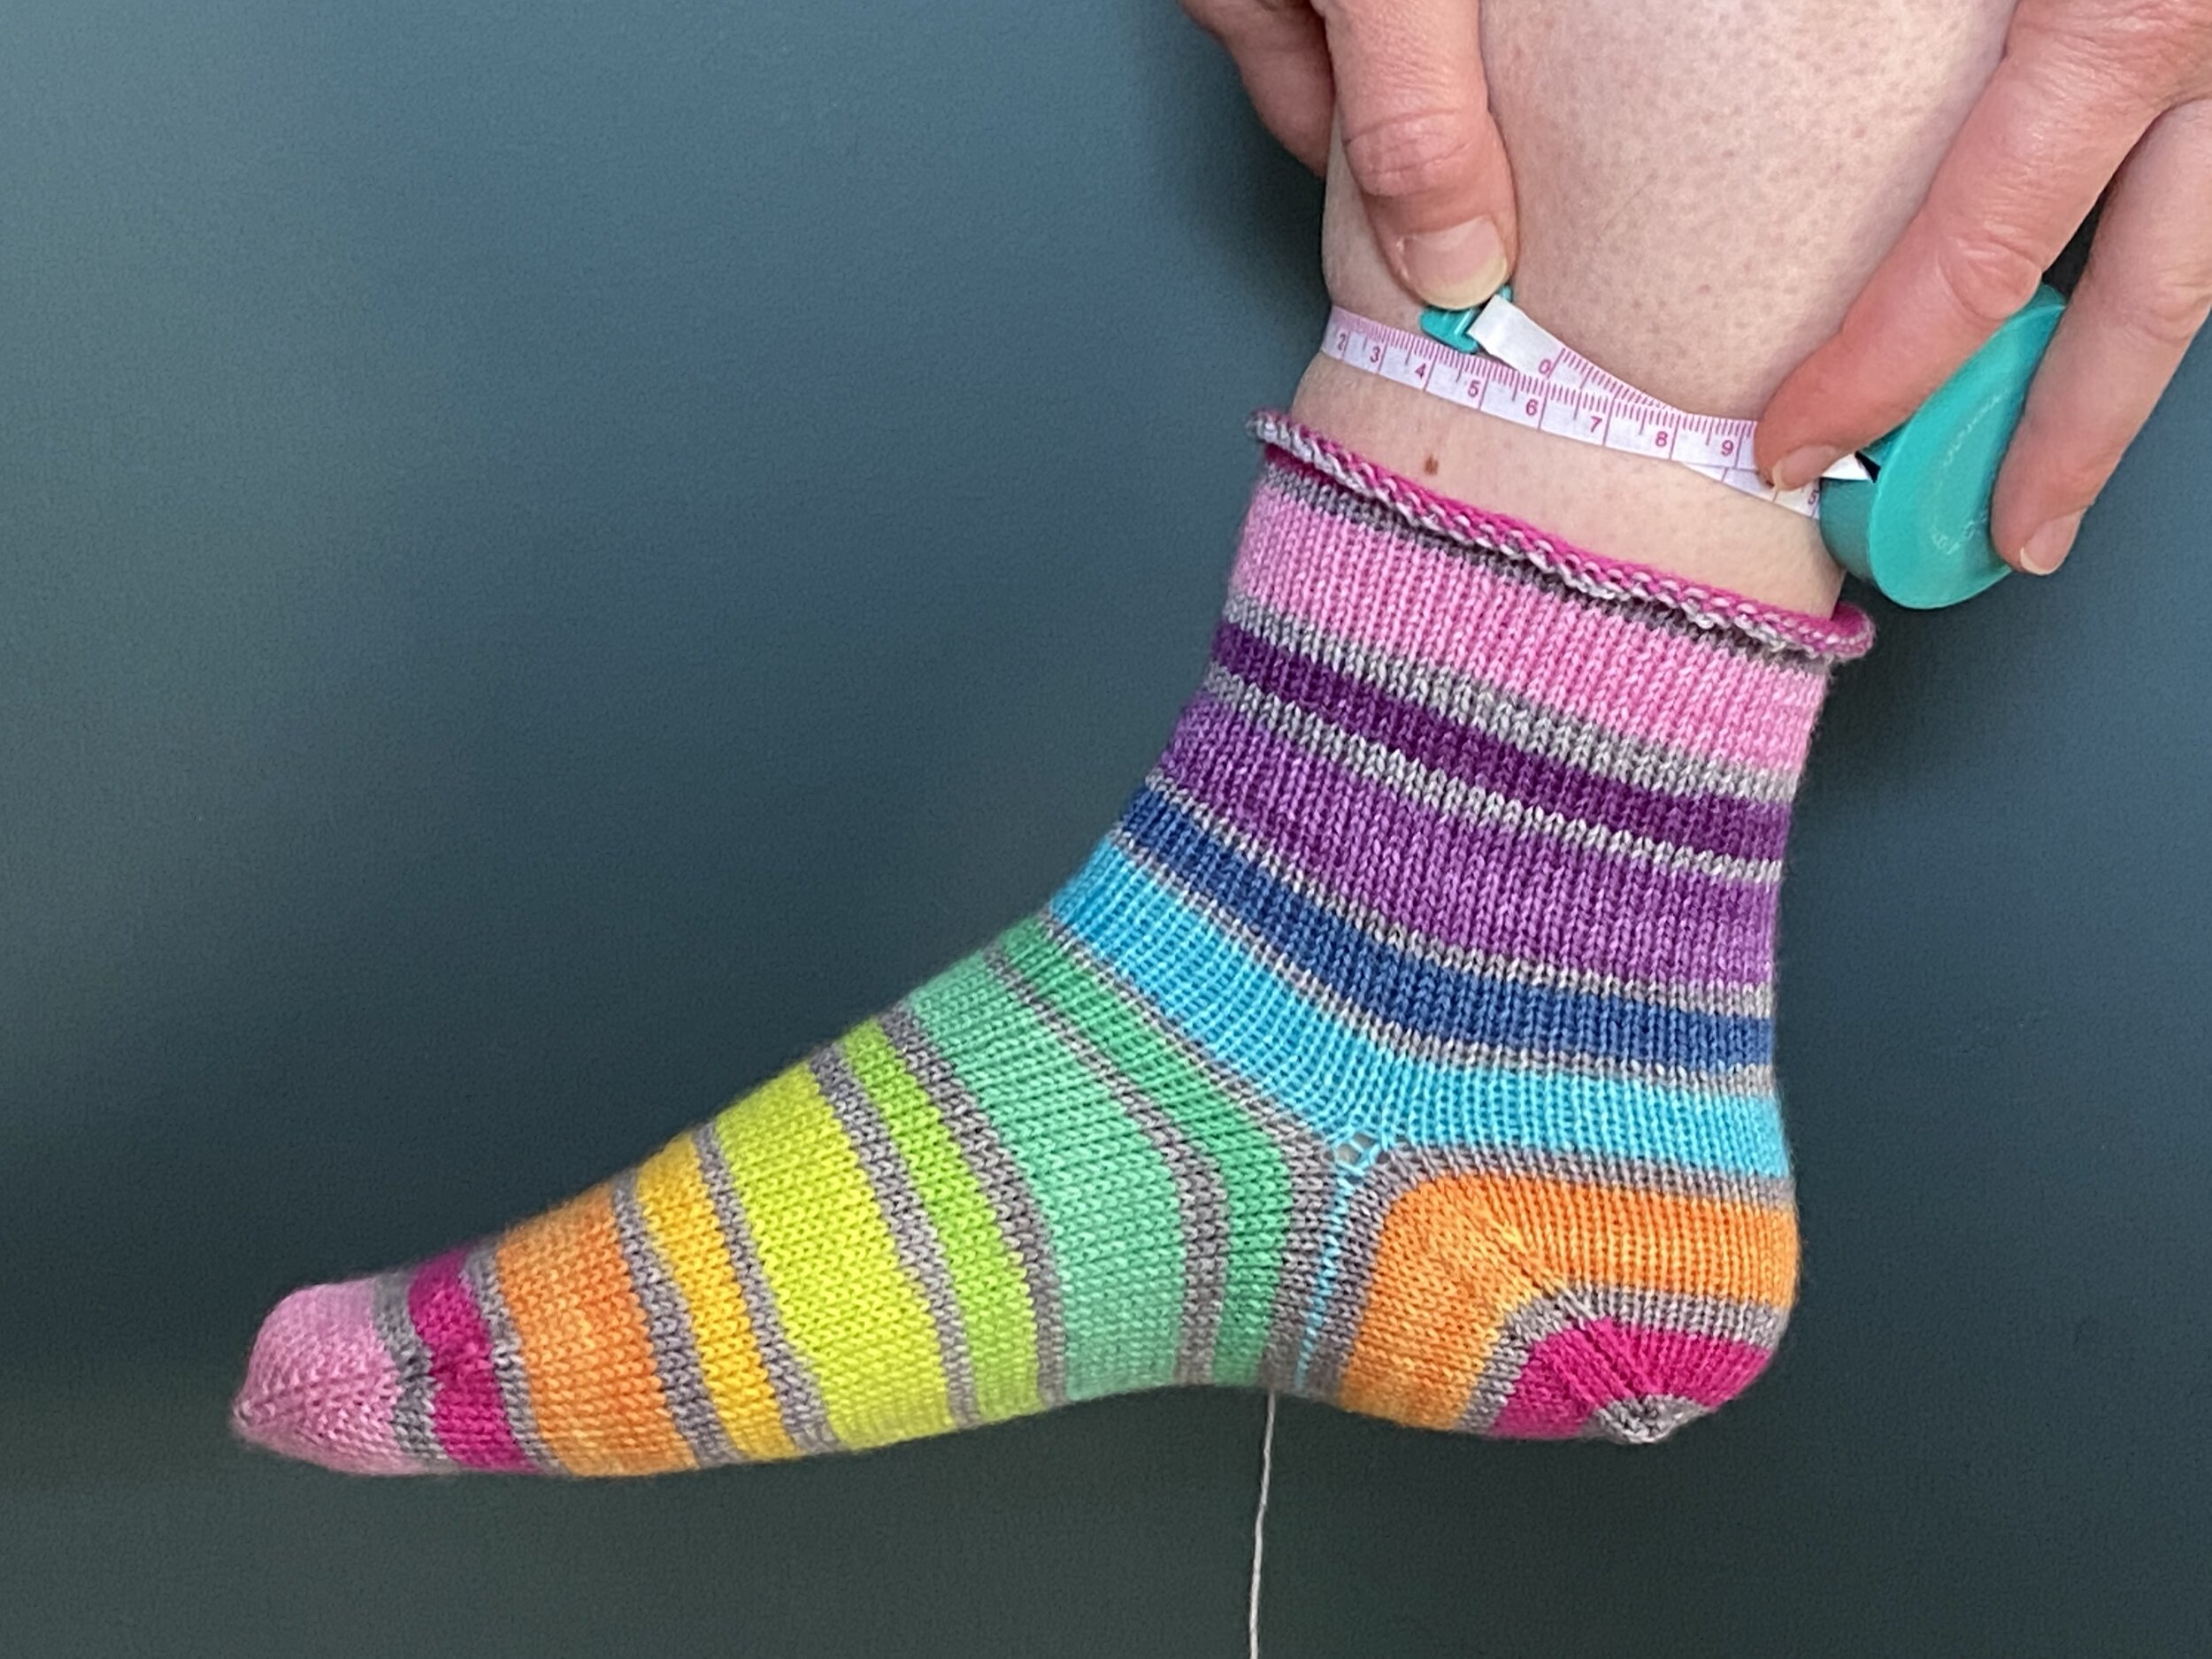
My ankle at this height (10cm [4in] from the top of the heel) measures 26cm [10.25in] circumference.
Next, measure the circumference of the widest part of the calf. It doesn’t matter if you aren’t planning to make your socks that long – we are just working out a sensible rate of increase.

My calf measures 40cm [15.75in] at the widest point.
Make a small mark on your leg at that height, and then measure the length from the top of your sock to the widest part of your calf.

The widest part of my calf is 17cm [6.75in] above the top of my sock.
Now we have all the numbers we need to work out a rate of increase for our calves.
1. Divide the number of stitches you currently have on your needles by the circumference of your ankle at this height. I am going to work through the calculation in cm, but it is done in exactly the same way if you are working in inches.
I have 72 stitches on my needles, and my ankle circumference is 26cm.
72 / 26 = 2.8 stitches per cm
2. Calculate how many stitches you will need at the widest point of your calf by multiplying the calf circumference by the number of stitches per cm.
My calf circumference is 40cm and I have 2.8 stitches per cm.
40 x 2.8 = 112 stitches.
3. If I wanted to knit socks right up to the widest point of my calf I would need to go from the 72 stitches I have now, up to 112 stitches, which is an increase of 40 stitches. (112 - 72 = 40 stitches)
4. If we are increasing 2 stitches in each calf increase round, that means 20 calf increase rounds would be required. (40 / 2 = 20 increase rounds)
5. We need to calculate how many rounds would be worked between the existing height of the sock, and the widest point of the calf. That’s a distance of 17cm [6.75in]. My round tension is 50 rounds to 10cm [4in].
6. Work out how many rounds there are to 1cm (or 1in if you are working in inches – the calculation is done the same way). 50 / 10 = 5 rounds per cm. Or 50 / 4 = 12.5 rounds per inch.
7. Multiply the rounds per cm (or inch) by the distance up to the widest point of the calf. This tells us how may rounds would need to be worked to get to the widest point. 5 x 17 = 85 rounds.
8. Now we know how many calf increase rounds are required (20) and how many rounds would be worked in total (85). So we can calculate how frequently we need to work those increases by dividing the total number by the number of increase rounds. 85 / 20 = 4.25
So what does 4.25 mean? It means that for every 4.25 rounds I work, I need to have done a calf increase round. But of course it’s not possible to work a quarter of a round (in this context). So we are going to round up to 5. I would suggest that you round up, even if you calculated 4.1, because you will want your sock to fit snugly around the calf and not to be baggy. It is better to have too few increases, try on as you go, and add some extras if needed.
Having calculated the frequency of my calf increases I can now write my calf instructions as follows:
Place a stitch marker in the centre of the back of the leg of your sock (so half-way across the back of the heel). On calf increase rounds you will work as follows (abbreviations are explained at the bottom of this post):
Rounds 1–4: Knit.
Round 5 (Calf increase): Knit to 1 stitch before marker, M1L, k1, slm, k1, M1R, knit to end. 2 stitches increased.
Repeat these 5 rounds until you are happy with the height of your sock. You will likely want to complete your sock with some ribbing, so leave sufficient yarn to work approximately 5cm [2in], or your preferred depth, of 1x1 or 2x2 rib.
Cast off all stitches using a stretchy method such as this one: Stretchy Cast Off
If you calculated that you need to work your increases every 8 rounds, for example, then you will work rounds 1–7 as knit and then do the increases on round 8. Just adjust according to your own calculations, and you can of course, try on your sock as you go and make changes if needed.

Working your calf increases in this way makes an attractive shape at the back of the calf, as you can see starting to appear in the image above.
If you need some sock yarn stash enhancement to help your socks on the go, you can see all of the sock yarns we sell over on our online shop here: Beautiful sock yarns
We will be back with a final post and some finished photos in two weeks’ time. I hope you have enjoyed the Use Every Scrap KAL. Don’t forget that you can still join in! The KAL thread will be running through to the end of September, and will stay open for a good while after that, so do post a photo of your progress over there.
Happy sock knitting!
Abbreviations
k: Knit
M1L: Make 1 left; bring the tip of the left needle under the strand between stitches, from front to back, then knit through the back of this loop (1 stitch increased)
M1R: Make 1 right; bring the tip of the left needle under the strand between stitches, from back to front, then knit through the front of this loop (1 stitch increased)
slm: Slip marker