

This month’s Boost Your Knitting pattern, the Totally Tubular Mittens, makes great use of the tubular cast on in the round. But how do you get started if your project is flat? Today, I’ll take you step by step through working a oh tubular cast on for flat knitting.
When it is worked flat, the 1x1 tubular cast on naturally gives an odd number of stitches, and the row starts and ends with a purl. If you want an even number of stitches, it is straightforward to either increase or decrease in the first row after the tubular join.

1. Using waste yarn and needles of a suitable size, cast on half of your required number of stitches, rounded up. Here we require 15 sts, so we have cast on 8.

2. Starting with a knit row, work 3 rows in stocking stitch (thus ending with a knit row). You can work fewer rows, but I find it easier with a bit more fabric below the row where the action is taking place.

3. Change to your main yarn. Starting with a purl row, work 4 further rows in stocking stitch (thus ending with a knit row).

4. Looking at the fabric ready to work a WS row, and you should be able to see the purl bumps where the waste yarn and main yarn meet. Identify the row of main yarn loops that has waste yarn loops both above and below it. These loops will be used to create the knit stitches on your first row of ribbing. Your live stitches will create the purls.
5. Purl the first stitch on your needle.
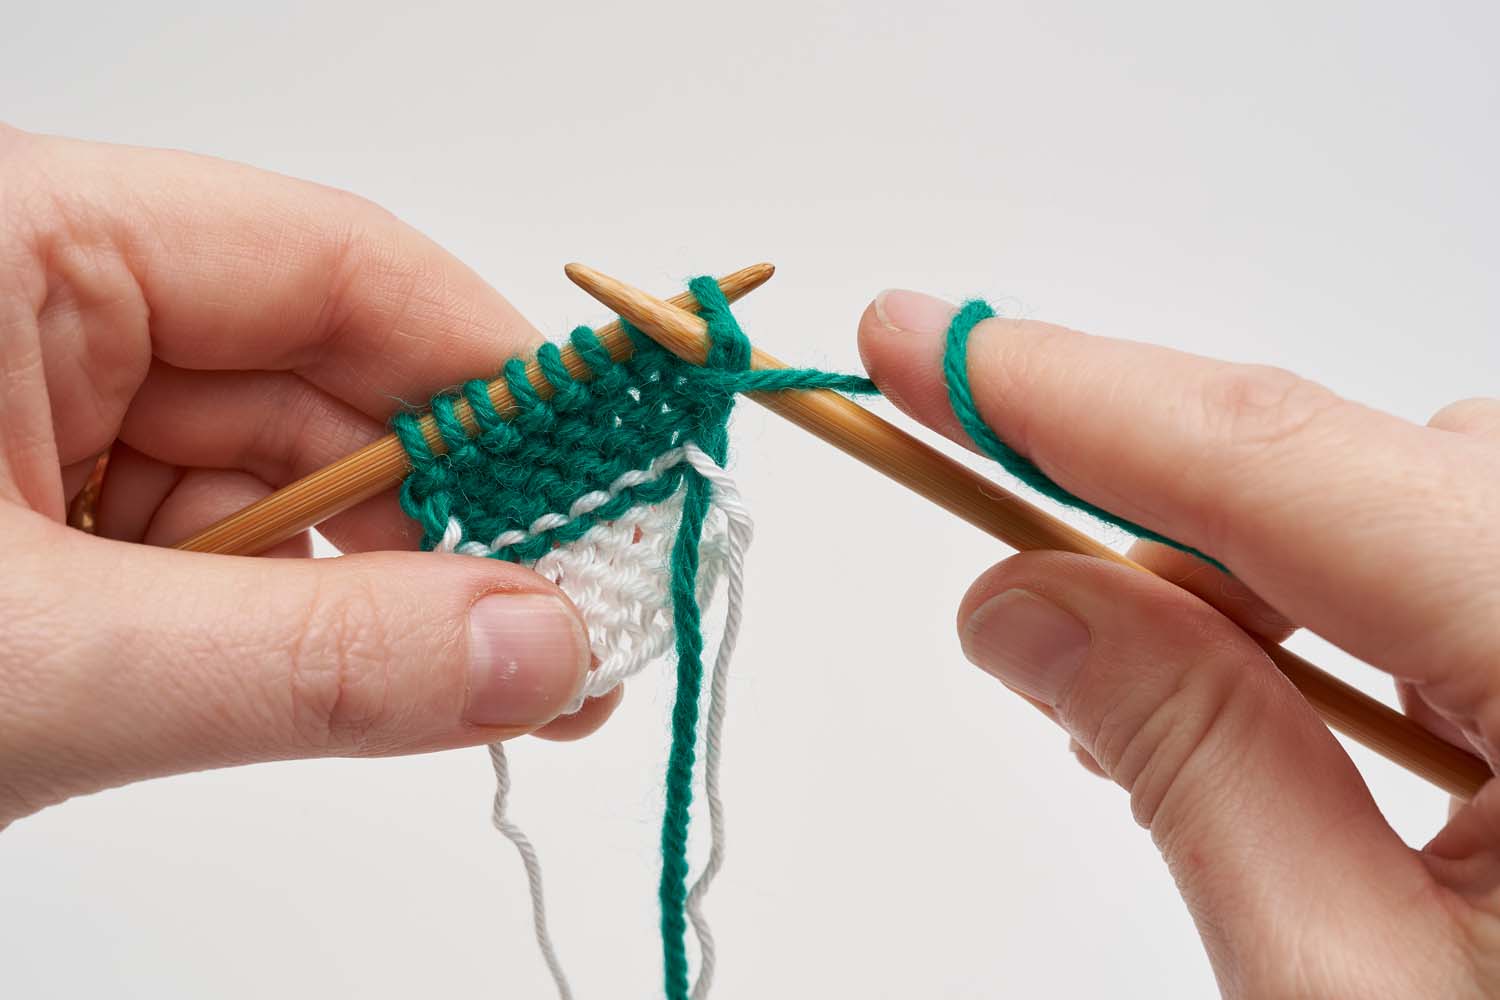
6. Insert your right needle tip from top to bottom into the first main yarn loop, where it meets the waste yarn.

7. Slip this loop onto your left needle.

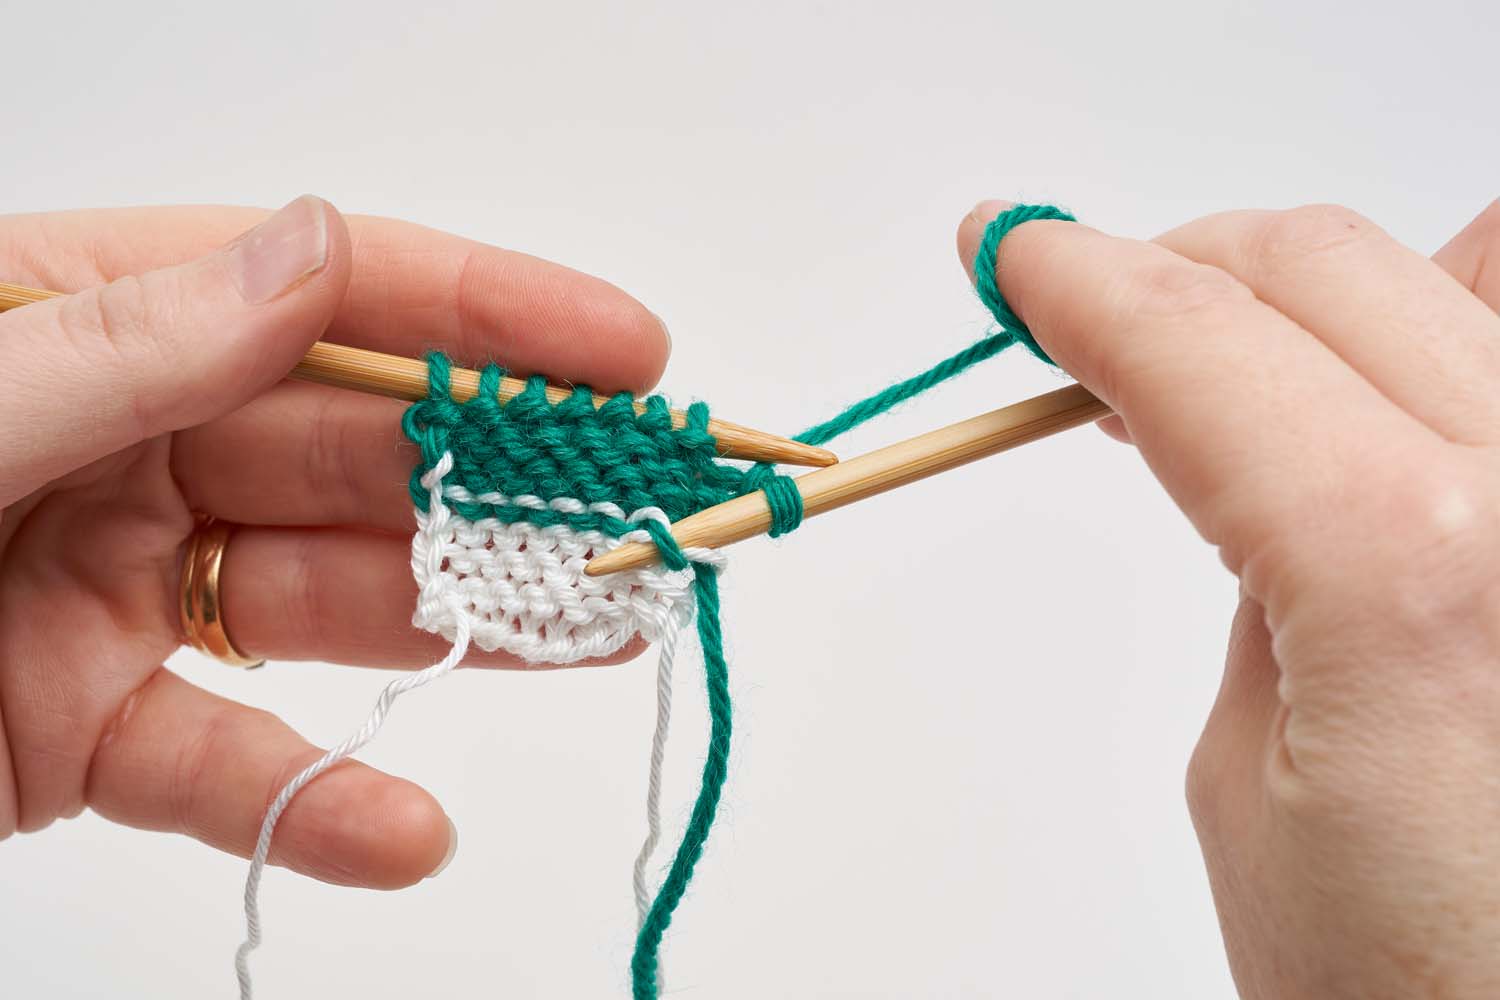
8. Knit the loop.

9. Repeat steps 5–8 until you have worked into all of the main yarn loops and have only 1 stitch remaining on your left needle (you have already picked up and knitted the last loop where it meets the waste yarn).

10. Purl the remaining stitch.

11. When you have worked a few more rows in rib, you can remove the waste yarn from the cast-on edge.

12. Carefully snip out the waste yarn.

13. The resulting edge of the fabric gives the impression that the stitches started from nowhere, and is one of my favourite edgings.
If you enjoyed this tutorial and haven’t signed up for Boost Your Knitting, why not considering joining the fun? You’ll get twelve months worth of patterns, accompanied by photo tutorials like this one as well as videos, all delivered to your inbox. When you sign up, you’ll receive all the patterns and tutorials that released to date (three as of this writing), and receive a new set at the beginning of each month – the next pattern will be released on June 3rd! You can find out more on the product page!